A sagging joist is a death trap. It may appear stable today, but one day it may collapse. A ceiling joist keeps the house’s structure together. When it becomes sagging, the joists are either too old or too much weight on them.
Sagging joists pose a threat to the main structure of the house. In case you notice a sagging ceiling joist in your house, do not delay fixing it. So, how to fix a sagging ceiling joist?
Repairing does not mean changing. You don’t have to replace a sagging joist. You can sometimes support it instead of being replaced. Because the house’s joists bear substantial weight, you need to know a little bit about structural principles. It is not necessary to know all the construction details as a structural engineer, only some basics. Here’s how to overcome the joists’ death trap.

Identifying Sagging Areas
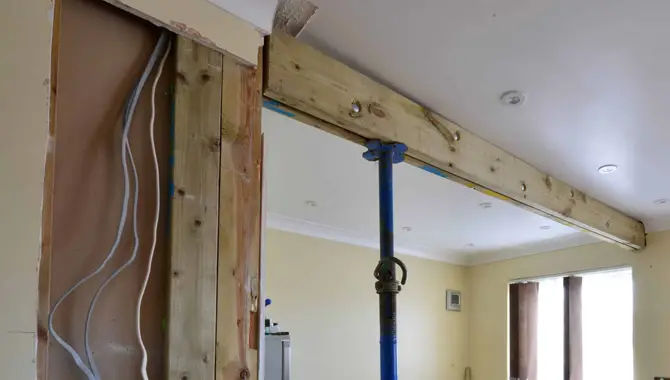
The first thing you need to do is find all of the sagging joists. You can identify them normally. For a clear understanding, place a parallel wooden beam in the middle of the joists. Most of the joists will touch the beam. The joists that won’t touch the beam have sagged.
Many people believe that their joints don’t sag much at all, and therefore they would not require a fix. Whatever sagging there is, it won’t take long for it to become a death trap. If the joists are fragile, you will have to replace them. Nevertheless, you can repairer the sagging if the joist is in good condition.
Lifting Joist
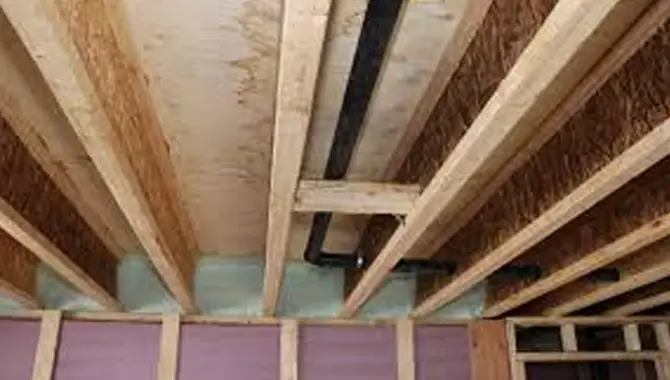
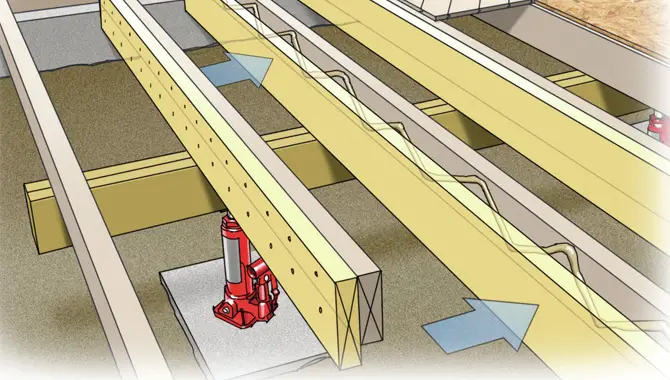
You have to lift the joist slightly upwards and held it with any support to fix the sagging ceiling joist. Initially, it would help if you temporarily raised the joists before doing permanent work. There are several ways to lift a joist.
- Any wooden beam will do. Take a wooden beam that is a little longer than the distance between the floor joist and the floor. Now apply gentle pressure to the part that is sagging and slowly lift it upwards. Beams will work if there are very small problems in the joist. Nevertheless, you can’t use beams if they sag too much. It will damage the floor as a result of the extra pressure.
- Likewise, you can lift the joists with a jacking stand as necessary. Using a jacking stand is less tiresome. Jacking stands, however, cannot be used at very high altitudes. You can place bricks or anything else under it.
- Using high-strength ratchet straps is the most convenient way. Attach the ratchet straps to the sagging part first. Next, please attach it to the roof rafter and lift it.
Best Way Of Fixing

There are several ways to keep the joist permanently in the same spot after temporarily raising it. To choose the right method, You have to understand the quality of the joist and the amount of sagging. We’ll go over them all briefly.
1. King Post
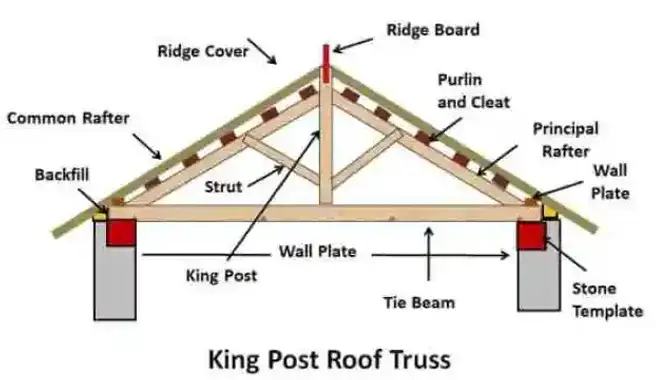
The King post might be unfamiliar to you if you’ve never worked in your attic before. A simple King post distributes any excess load on a joist across the entire structure. King posts are just pieces of wood. Providing direct contact from the Roof Rafter to the joist.
Attach them to the principal rafter with two stutters in the triangle. As a result, the joists rise to the top, and sagging will reduce. There are several types of king posts. Truss 6 A and D are the best for sagging, however. Buy King post first, or follow the structure if you want.
- With screws, attach one side of the main beam of the King Post to the Roof rafter.
- Attach the screw to the other side of the joist where the sagging is occurring. Use 4/5 screws on all sides if necessary.
- Install the strut on the rafters with screws in the same style.
Screws are the safest method here. Because if you want to nail her with a hammer, it will damage the joist. Use screws instead. You can also use bolts.
2. Laying Beams On The Ceiling Joist
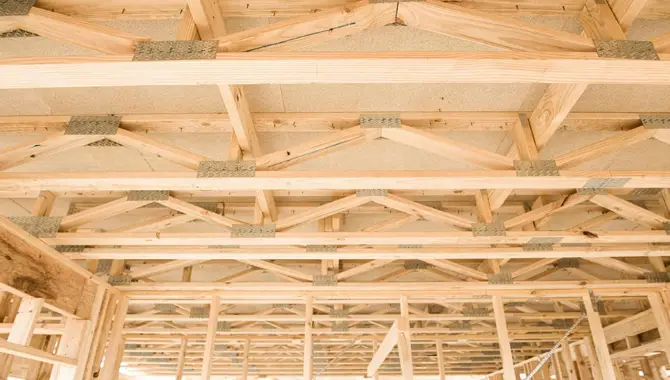
When more than one joist sags, it is best to attach the joists with a strong beam to the ceiling joist. These beams are efficient and easy to install. One beam can fix the sagging of all ceiling joists.
- You will need wooden beams of 2 x 6 or 3 x 6.
- Attach the beam to the tie beam by screwing or bolting it up above the ceiling.
- Of course, there will be a lot of screws since it will be very heavy.
- Afterward, two large bolts will need to be used to attach the beam to the joist by Considering the low thickness of the joist, and it cannot be bolted or drilled. Therefore, you need two pieces of metal measuring 0.5 x 4 inches. It needs to make two holes that are the same in diameter as the bolt on both sides.
- After that, you should place one piece of metal on top of the beam, the other under the joist, and two bolts should be fastened on either side. Make sure both bolts are tightened. Tighter bolts will raise the joists. If there are multiple joists, use bolts in the same manner in each.
If there is a problem with multiple joists, use bolts in the same way in each.
3. An Additional Joist
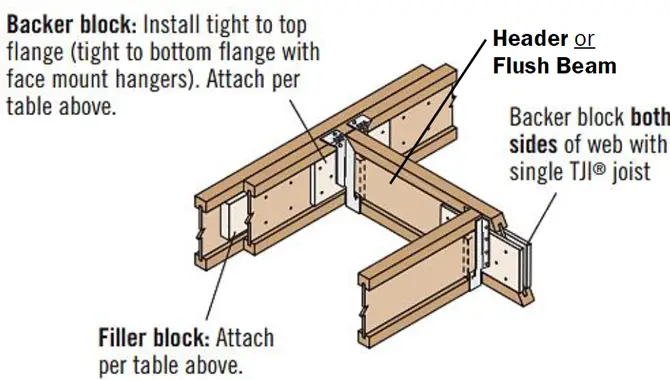
If the condition of the joist is very bad, installing a backup joist would be the best solution. Back The up joist is a new joist attached to the previous one.
- Put two joist hanger hangers on either side of the joist that will require a backup joist. Attach them with screws.
- Install the backup joist on the hanger.
- Add the new joist to the old one. Attach it with screws. For best results, use bolts.
4. Sistering Joist
Sitting on the floor joist is a very common method. We’re sure you’ve seen it or done it. If your ceiling joists have sagged, you can fix the sagging ceiling joist with sistering, which is not a full-proof solution to all types of sagging, however. Sistering is the best solution if the joist is sagging so much that it is about to break or has broken.
- For sistering, the joist will require two pieces of the wood plank. The planks should be at least one foot longer than the sagging part.
- Now you need to drill a hole in the joist. The holes need to be the same size on both sides of the plank.
- Attach the planks to the two sides of the joists, insert the bolts into the drilled part, and tighten them.
- Furthermore, you have to install a few more bolts between the joist and the plank. We will recommend using at least four bolts.
Fixing the sagging of all the joists in the right way will make the house and you safer.
Additional Tips
Many of us often overlook the joist because of ignorance or a lack of familiarity with the structure. Keeping the joists in good condition, however, is necessary to the house’s structural integrity. The joists should never be soaked with rain. A joist is an area that you should check if it appears to have some problem. You should fix the issue immediately if it appears.
Conclusion
I hope now you know how to fix a sagging ceiling joist.
